GUDE PDUs
GUDE manufactures PDUs (Power Distribution Units) that are simple to use but have several excellent features. In the image below you can see the web UI from the 8291 model that we will be adding to XiO Cloud in this guide. You can see the names of some of the ports and the status, if they are switched on or off. This particular model has outlets for 5V, 12V, 24V and 230V but there are other models that have other configurations.
Click the images to see larger versions of them
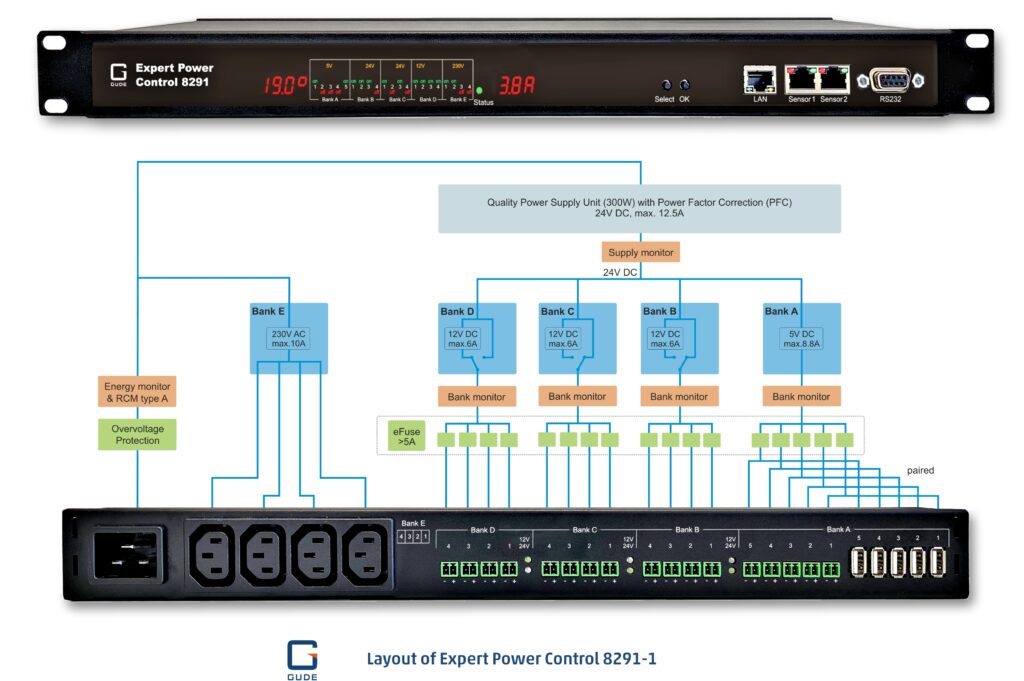
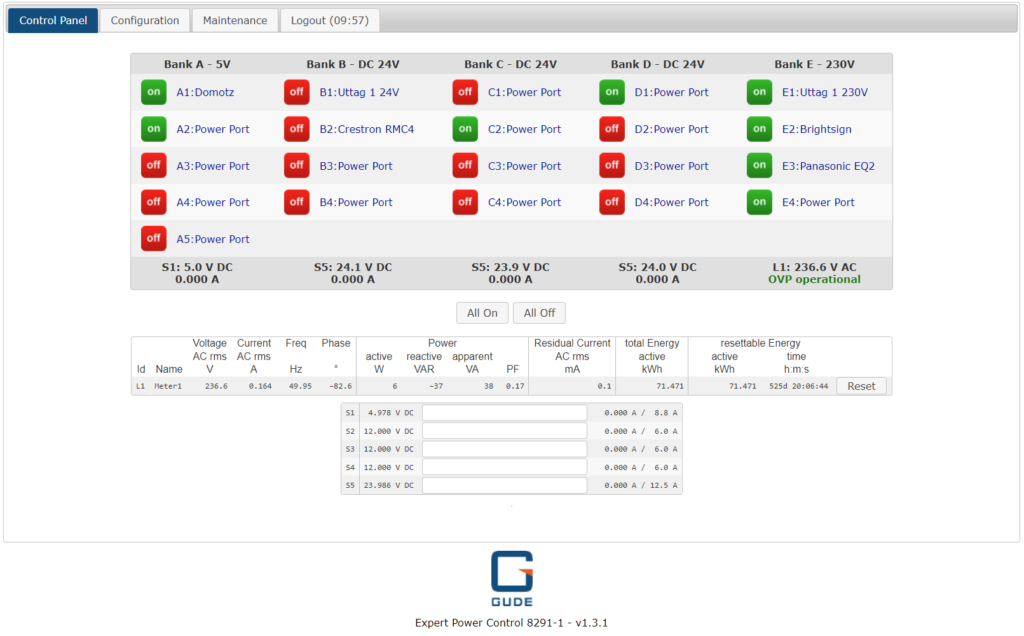
Crestron XiO Cloud
Crestron XiO Cloud is Crestron’s cloud service for managing and monitoring. It resides in the Microsoft Azure IoT platform and it is evolving all the time, adding more and more features. One of the latest ones is the ability to add third party power controllers like the GUDE PDUs.
Prerequisites
So, what do you need to actually follow this guide?
Of course, you will need a GUDE PDU. You will also need an XiO Cloud account. If you do not have one, you can contact a Crestron dealer to get one.
You will also need a Crestron XiO Cloud Gateway as this is what handles the communication between the GUDE PDU and the XiO Cloud service. If you don’t have an XiO Cloud Gateway already installed, I have made a guide for this. You can find it here. The XiO Cloud Gateway runs on a Red Hat (or a Alma Linux, Rocky Linux or Oracle Linux) 8.x server. To install one, check out this guide.
The XiO Cloud Gateway needs to run firmware version 2.7000.00080 or later for this to work.
Adding a GUDE PDU
When you log in to the XiO Cloud portal, either using http://portal.crestron.io or through your dealer portal, your default landing page is the Dashboard where you can see some basic health information and other useful information. In the image below you only see two of the tiles since it’s only the first one that is relevant here, the one showing we have a device online. That device is our gateway device.

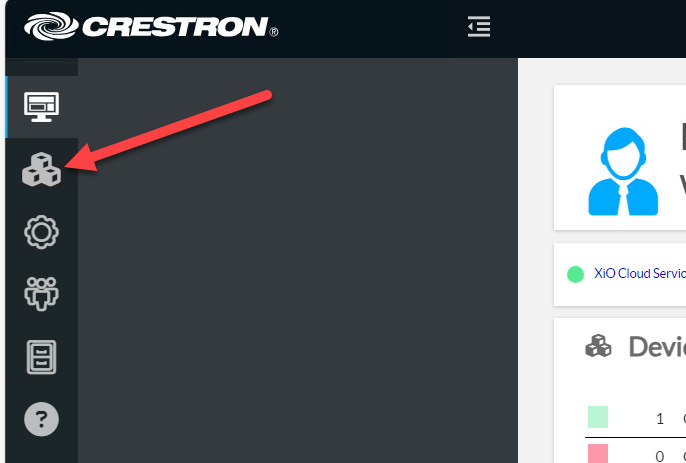
To start adding devices, and in this guide, the GUDE PDU, click the samll icon with the three boxes to the left.
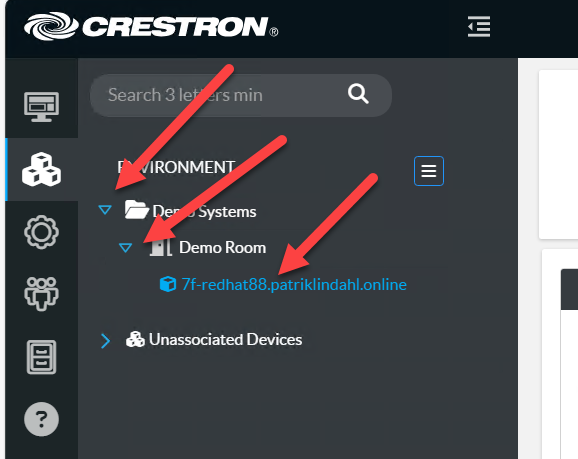
In another guide, the one about adding the gateway, I walked you through adding nodes and rooms and finally the gateway device. These can be seen below. Go to you XiO Cloud Gateway here.
When you have chosen your gateway, press the “Connected Devices” tab.
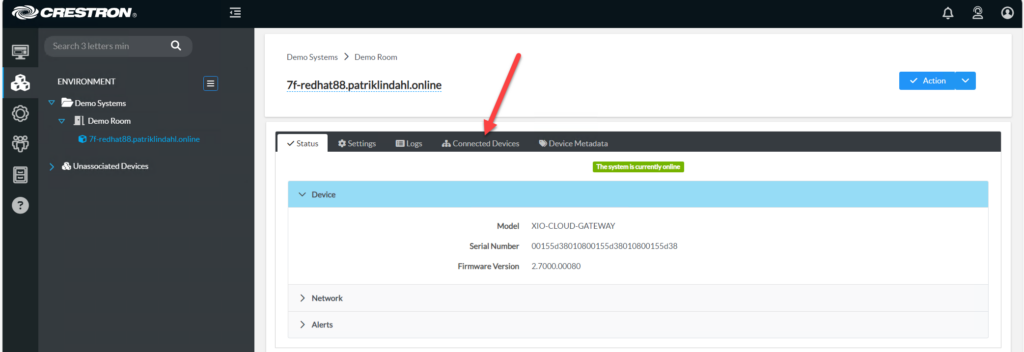
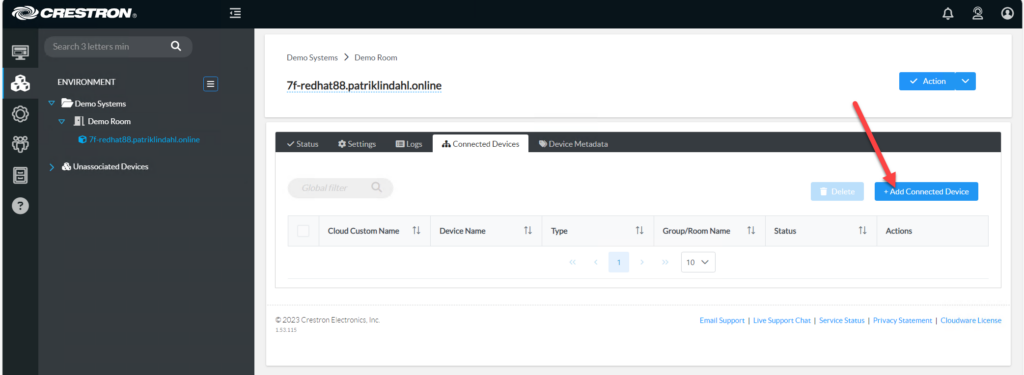
Then press the “Add Connected Device” button to the right
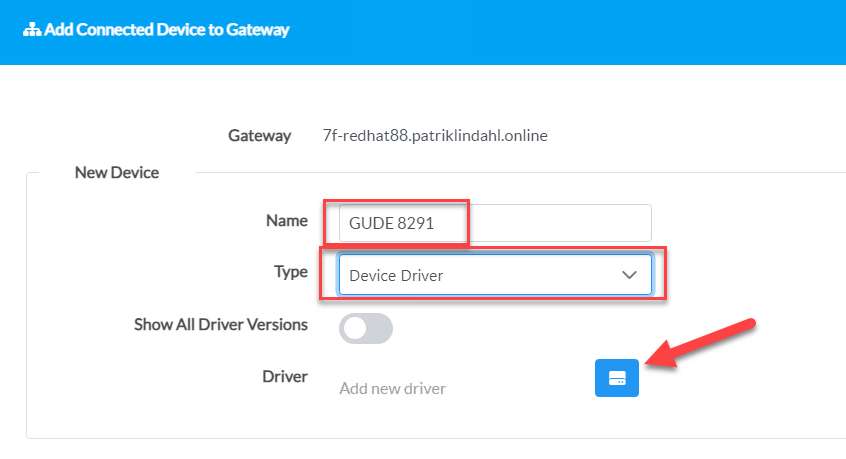
Name your new device and for a GUDE PDU unit, choose “Device Driver” in the Type drop-down.
Then press the button to the right of the Driver text (where the arrow points)
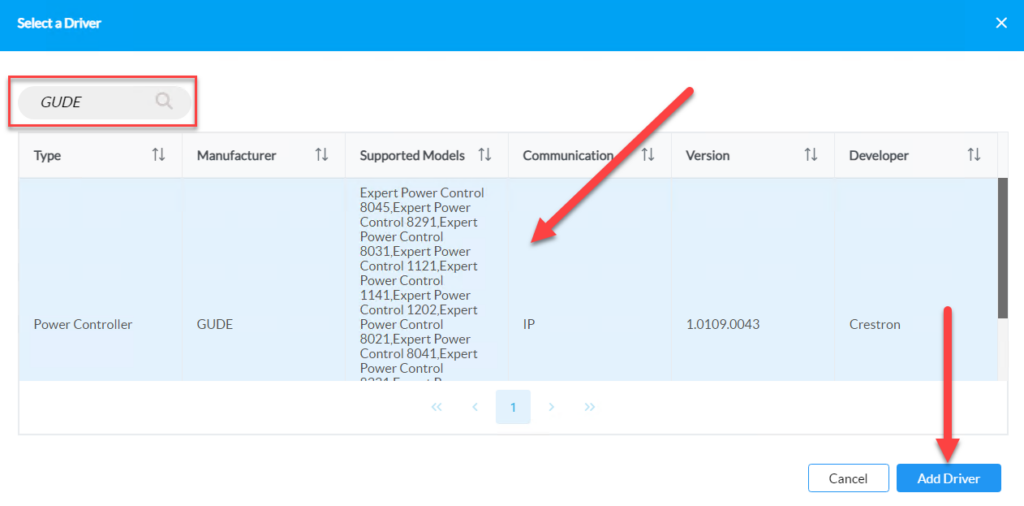
Filter for the word GUDE, highlight the GUDE Power Controller (it’s the same driver for all devices) and then press the “Add Driver” button.
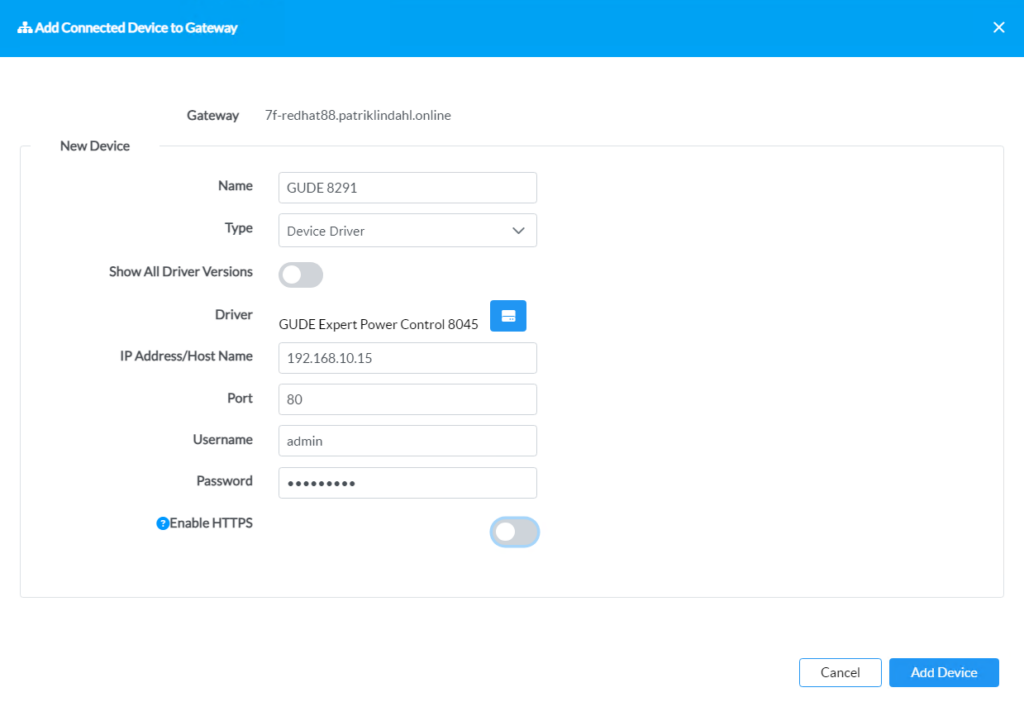
Add the IP address of your GUDE PDU and enter the credentials for it. If you don’t have a password for your GUDE PDU, you should really add one in the GUDE Web UI, but it will work without it to. If you don’t have a password, just enter anything, it won’t matter.
Default is to use port 80 and no encryption as in the image below. If you want to use encryption, go to the next step below.
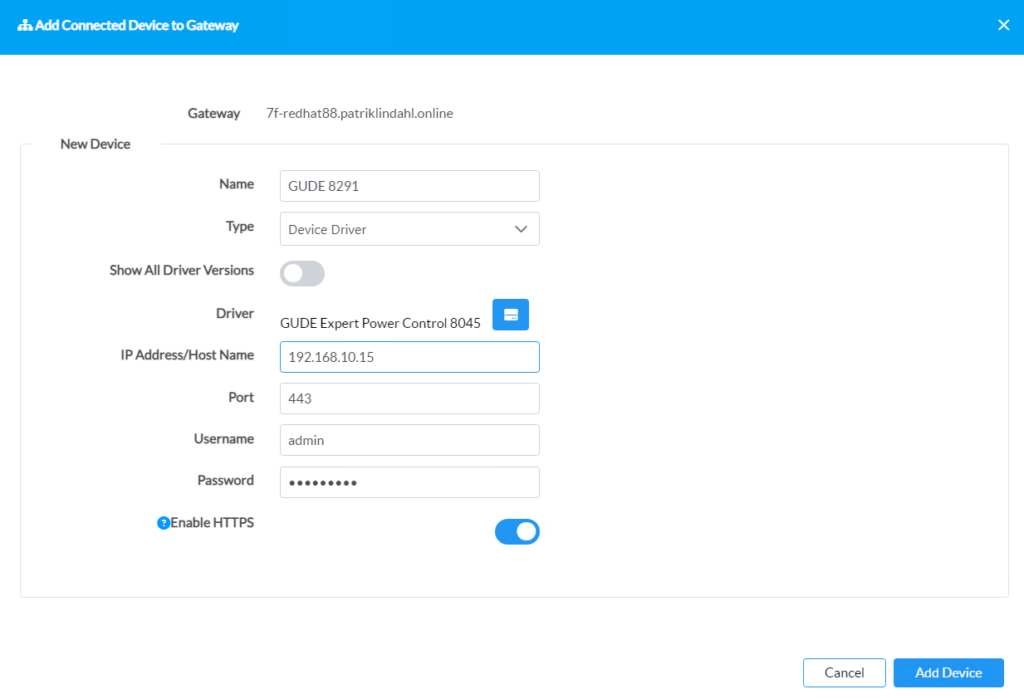
You should always strive to use encryption where possible. The below images shows you how to adjust the values in the form for this. Change to port 443 and turn on the “Enable HTTPS” option.
Now, press “Add Device”
First, the device will be Offline for a couple of seconds

As soon as the XiO Cloud Gateway has made a connection (usually within 30 seconds), the device will show as Online in the Status column.

To put it in a room in XiO Cloud, just use drag and drop to drag it in place in the left menu. I’m here putting it in my “Demo Room”
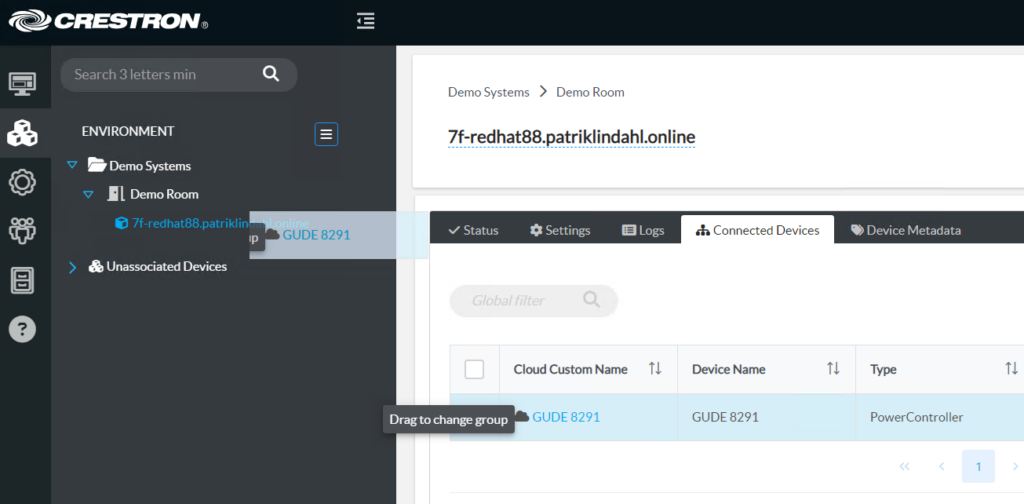
The column for “Group/Room Name” should now show the room where you put the device and you should see it in the menu to the left.

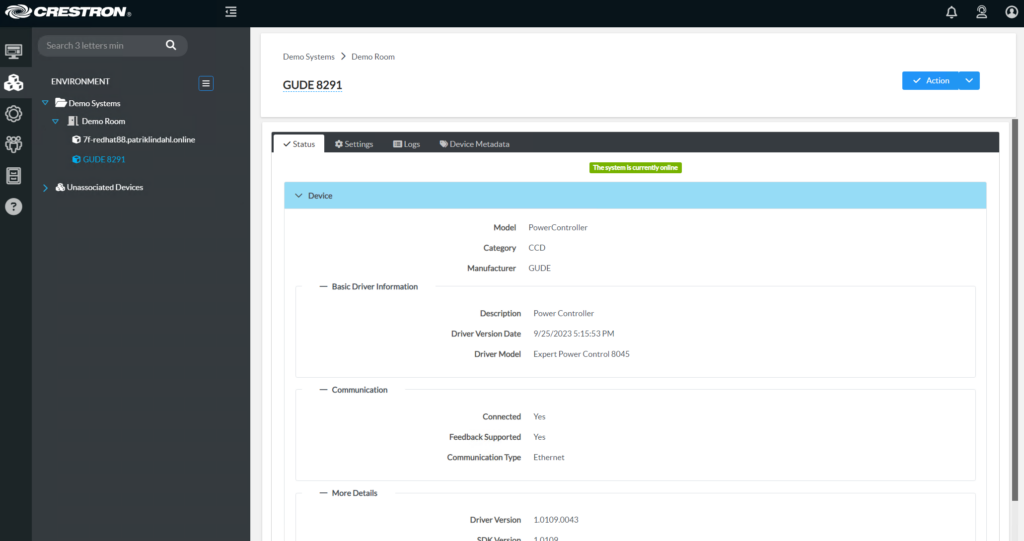
Highlight the device in the menu to the left and you should see the information about the device.
If I go in to the Web UI of the device, I will see the following on the first page

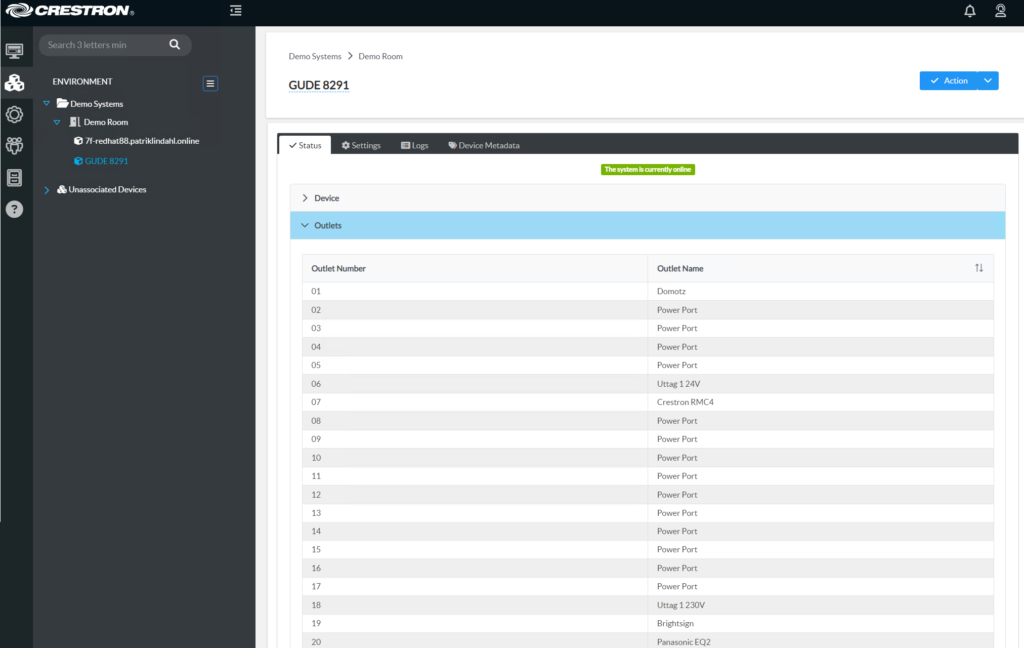
If I choose the “Outlets” sub menu in XiO Cloud, the same information should be there, that is, the names of the outlets has been collected and added in the XiO Web UI
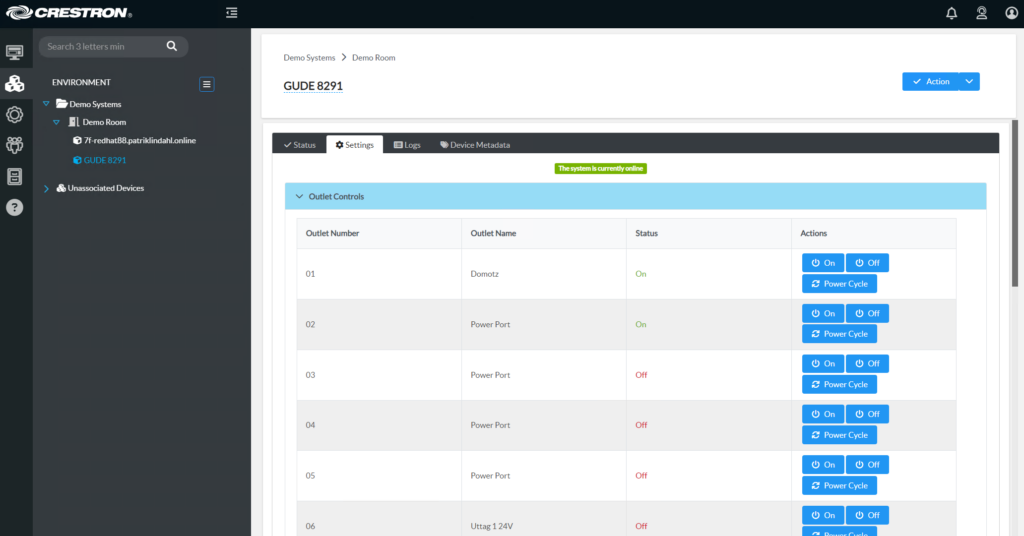
If I go to the Settings tab, all outlets will be in a list and I can turn individual outlets on, off or simply power cycle them. When power cycling an outlet, they will be turned off, the device will wait for 10 seconds (this can be changed to another amount of seconds in the GUDE Web UI) and then turn the outlet on again.
Lets add an alert if the GUDE for some reason goes offline
Of course, we don’t want to have to sit and wait for things to happen in the XiO Cloud UI all days. We need to know if something happens that we will need to act on.
Lets add an alert so that we get an e-mail or SMS (you need to configure this on a user level in XiO Cloud) if the device goes offline.
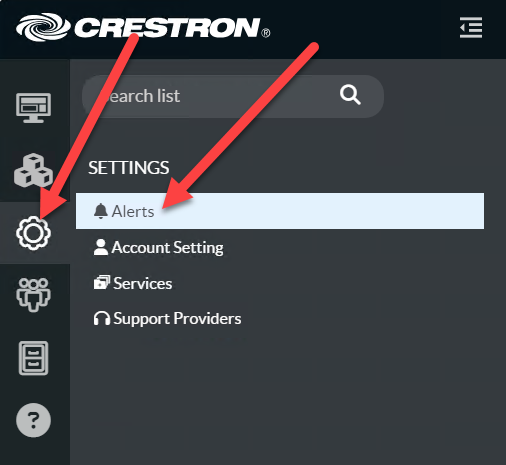
First, click the settings icon in the left most menu, then press Alerts
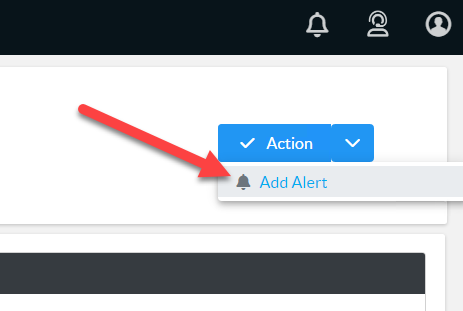
Choose PowerController in the Device Model drop-down to first check if there are any alerts set already. If there is no offline alert yet, lets add one. Press the arrow beside the Actions button in the upper right
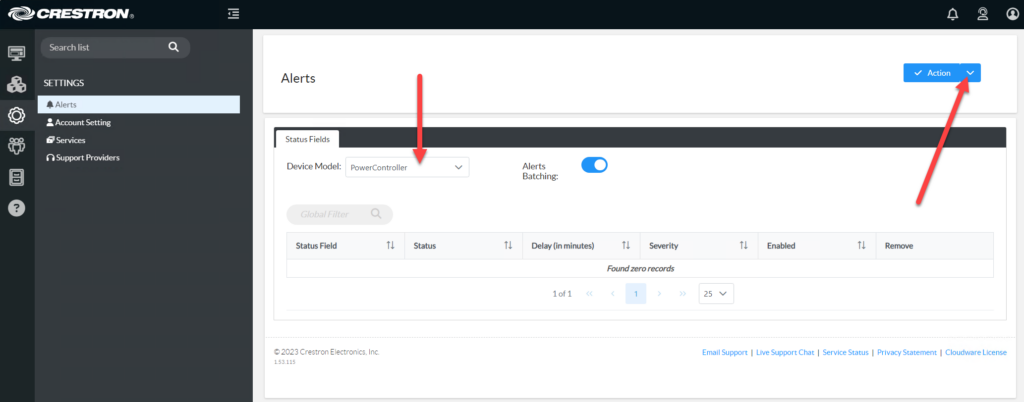
Choose “Add Alert”
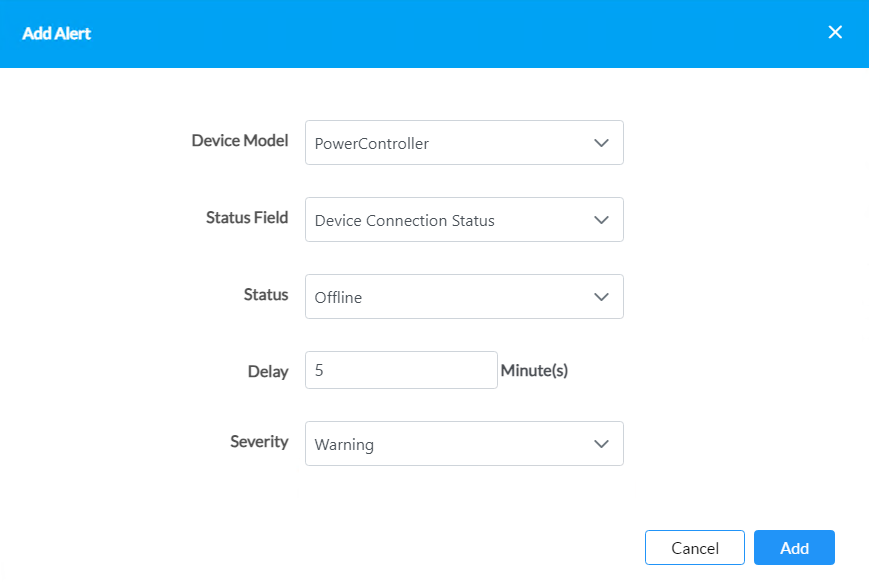
If you chose PowerController before, this will be chosen for you. If you did not, just choose it here under “Device Model”. Also, change the Status field to “Device Connection Status”, the Status to “Offline” and enter a delay for how many minutes the device is allowed to be offline before sending you the alert. This delay is so taht you don’t get false positives just because someone reboots a switch or a short power outage or something else that will remediate itself quickly. Also, add a Severity level, that is, how big a problem is it if a PowerController goes offline.
You should now have your alert set up. Make sure your user has alerts activated and that you get alerts for atleast that severity level in your user preferences.
